As an Amazon Associate, we earn from qualifying purchases. Some links on this site are affiliate links at no extra cost to you. Our recommendations are based on thorough research and editorial judgment.

How to Repair a Torn Tent Safely

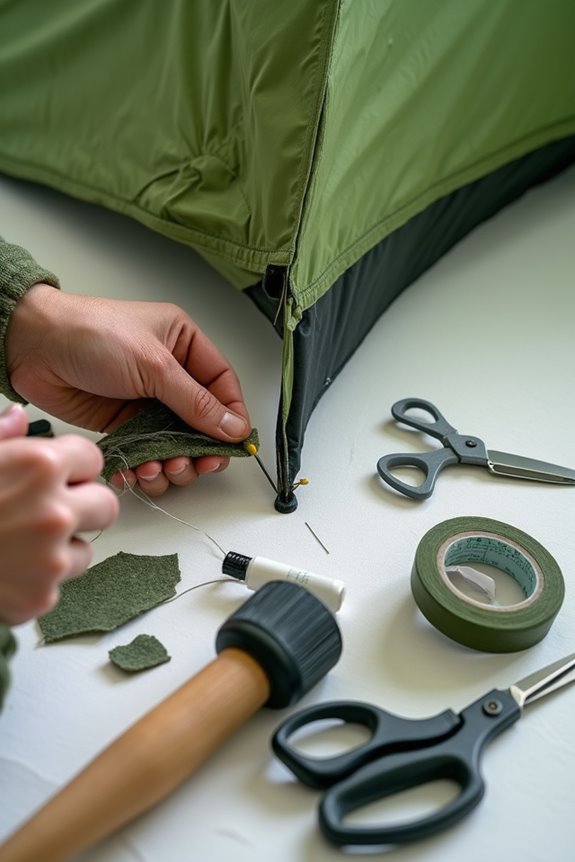
A torn tent should be repaired according to the fabric, coating, seam, mesh, pole, and tension involved. Start by cleaning and drying the area, then decide whether a field patch is enough for the night or the damage needs a manufacturer-compatible repair. Keep the shelter safe from further stress, and do not rely on a patch when the structure or weather protection remains uncertain.
Key Takeaways
- Assess the fabric, seam, mesh, coating, pole, zipper, and surrounding tension before choosing a repair.
- Use outdoor repair tape or a compatible patch only on clean, dry surfaces and for the intended material.
- Treat pole, zipper, seam, and large structural damage as different repair problems.
- Allow adhesives or seam sealers to cure according to their instructions before stressing the repair.
- Seek manufacturer or professional help when damage affects shelter structure or waterproof integrity.
Assessing the Damage
You may be interested



Identify what failed: outer fabric, mesh, seam, floor, coating, zipper, pole, guy point, or attachment. Check around the visible tear for stretched fabric, loose stitching, delamination, punctures, or damaged hardware. Photograph the area and note whether the tent must remain weatherproof or load-bearing. A clean, dry repair surface is easier to assess and patch.
Quick Fixes for Temporary Repairs

For a field repair, use outdoor fabric repair tape or a patch compatible with the tent material. Clean and dry the area, round patch corners, press firmly, and keep the repair away from active tension when possible. Duct tape may help temporarily but can leave adhesive residue or damage some coatings. Pole sleeves can stabilize a broken section for a short period; they are not a substitute for a proper replacement.
Permanent Repair Techniques

Temporary fixes can save the day when disaster strikes during a camping trip, but for those who want their tent to stand the test of time, permanent repair techniques are where the magic happens. Cleaning the area is key; dirt can ruin even the best adhesive patching efforts. For rips, sewing with nylon thread and reinforcing with seam tape creates a sturdy hold. Adhesive patches, either nylon or polyester, provide a lasting fix, while fabric glue offers a weatherproof bond. Don’t forget seam sealing! Applying seam sealer guarantees that the repaired areas remain waterproof. With the right tools and techniques, like Tenacious Tape and proper maintenance, campers can keep their tents ready for many adventures ahead, rain or shine!
Repairing Tent Poles

While enjoying the great outdoors, nothing can derail a camping trip quite like a broken tent pole. When faced with this dilemma, the first step is ensuring proper pole alignment; align those broken sections as straight as possible. Enter splint techniques: using a pole repair sleeve, which is a snug tube that fits over the damaged area, can save the day. Slide it over the break, bending any splayed ends if necessary. Secure the sleeve with duct tape for stability. If you’re in a pinch without a sleeve, a tent stake can work as a makeshift splint. Just tape it firmly around the break, and you’re back in business, ready to enjoy the stars without a leaky tent!
Tools and Materials Needed

When it comes to fixing a torn tent, having the right tools and materials on hand can make all the difference between a relaxing night under the stars and a frustrating battle with fabric. Essential items include repair kits, like Tear Mender for instant fixes or Tenacious Tape for a no-mess approach. Scissors are a must for cutting patches, while a sewing repair kit can help stitch up larger tears. For those who prefer adhesive options, options like HH-66 Vinyl Cement work wonders on laminated materials. Don’t forget safety pins for quick fixes and nylon cord for securing patches. With these handy tools, a little tear can quickly turn into a minor inconvenience rather than a camping catastrophe.
Preventive Measures for Tent Maintenance
Inspect the tent before and after trips, clean it according to the care label, dry it fully, and store it without trapped moisture or unnecessary compression. Pitch on suitable ground, protect the floor, use guylines correctly, and avoid overstressing zippers or poles. Reproof or seam-seal only when the product and fabric instructions support it.
Tips for Effective Repairs
Match the repair to the material, clean and dry the surface, round patch corners, press from the center outward, and avoid trapping dirt or wrinkles. Keep the tent ventilated while using adhesive or sealer, and allow the product’s stated cure time before folding or loading the area. Test the repair in a controlled way rather than discovering a leak in a storm.
When to Seek Professional Help
Seek the manufacturer or a professional repair service for large or multiple tears, damaged zippers, failed mesh panels, pole or hub damage, torn guy points, delaminated fabric, or repairs that must remain reliably waterproof. Ask whether the repair affects the warranty and whether a compatible replacement is safer than repeated patching. Do not rely on an improvised repair when structural failure could expose people to weather.
Frequently Asked Questions
Can I Use Regular Tape for Tent Repairs?
Regular household tape may work as a short field measure, but it can leave residue, peel, or damage a coating. Use tape made for the tent material when possible, apply it to a clean dry surface, and replace the temporary fix with a compatible repair later.
How Do I Store My Tent After Repairs?
Follow the repair product’s cure instructions, then clean and dry the tent fully before storage. Keep it loose or in the storage method recommended by the manufacturer, protect poles and hardware, and avoid sealing moisture inside the fabric.
What Types of Tents Are Easiest to Repair?
Repairability depends more on fabric, coating, seams, poles, zippers, and available replacement parts than on a simple tent category. A design with accessible panels and replaceable components may be easier to service. Check the maker’s repair program and materials before buying or attempting a repair.
Can I Waterproof My Tent After Repairing It?
Possibly, if the fabric and care instructions allow it. Identify whether the issue is a seam, worn surface treatment, puncture, or failed laminate, then use a compatible seam sealer or reproofing product. Test a small area first and do not assume a spray can restore a damaged waterproof membrane.
How Often Should I Inspect My Tent?
Inspect the tent before every trip, after difficult weather or rough pitching, and after storage. Check fabric, seams, floor, mesh, zippers, poles, guy points, and coatings. Repair small problems before they become larger, and seek help when the damage affects structure or waterproof protection.